
Git
git is a version control system. developers typically use git to control the version of the project and to work on more than one developer on the same project. large projects are controlled with git. Git and GitHub
What is Git? Install Git-Use and Push a Project on GitHub
GitHub
GitHub is a site to host code. usually, open-source projects are hosted on GitHub and shared with other developers. anyone from anywhere in the world can work on any project.
Didn’t use Ctrl Z while writing in Microsoft Word? This benefit is available during the creation of the project when using Git. For example, we’ve added a lot of features to a project. So the computer will not remember which features I have added, which features I have added on some days. While writing the code, we felt that the feature we added three days ago was good. There’s a problem with the next feature. What happens if the codes three days before the project have to be returned? Again, in the file you work on, the other developer will also have to work on that file. But how do you do it? Who wrote which codes, which codes will be followed, and how can they be managed? Git to solve such problems.
install git
What is Git? Git and GitHub: here we will learn how to install git, the basic git command. git how to upload or push a project to GitHub. how to clone, etc.
go to the link below and download git for windows. then install. mac or Linux can also be downloaded from the link below.
After installing Git, you need to add the path of the git by going to the path setting. Such as C:\Program Files (x86)\Git\cmd
For this, you need to click on the system from the control panel. From the system, click on the Advanced System setting. Then click on the environment variable. From there, click on the path from the user variable and edit it. And the cmd path of the git should be added. If git shows the information about the git by opening the command line to see if it is set correctly, then it should be understood that the right path has been set.
after installing git, we need to set the email and name. you need to write the following two commands:
| 123 | git config --global user.name "Your Name" git config --global user.email"Your Email" |
if you want to see if the username and email are set up correctly, the command will be written on the command line or terminal below:
| 123 | git config --global user.name git config --global user.email |
What is Git? Git and GitHub
pushing a project on GitHub
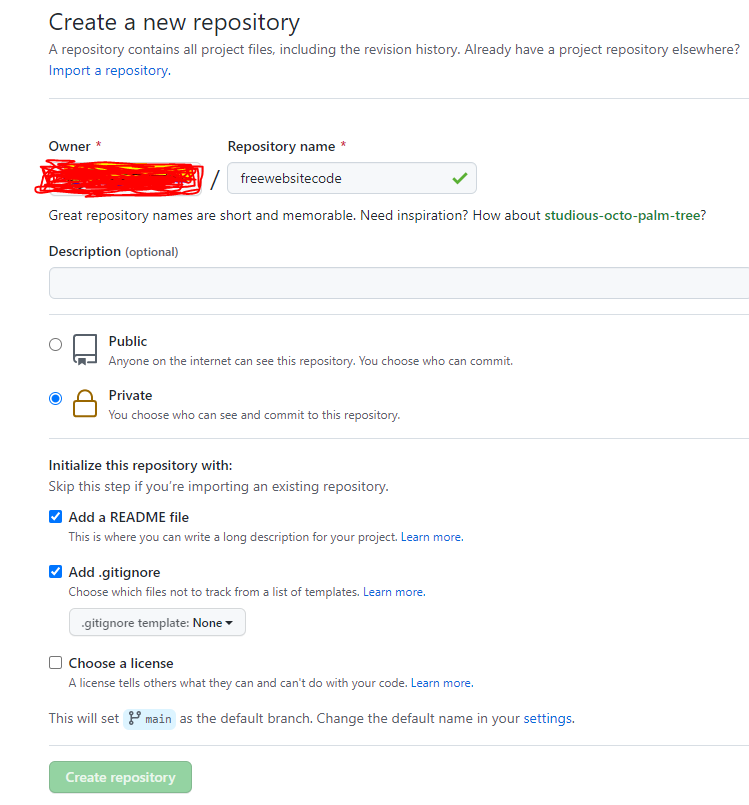
Now we can create a project. And I can upload it to GitHub github.com. I’ll open an account for him on GitHub. I will log in after opening the account. + Click on the sign and click on New Repository. It’s good to say that GitHub and GitHub are two different things. One is the version control system. Another is hosting. He thus hosts the Git projects.

then I’ll create a repository with a name.
after creating the repository, we will show the git commands of how we can push a project. as follows:

Now we’re going to create a project. Which we will push/upload to GitHub. For example, create a folder on the desktop. Under the name git-push-demo. I write any type of code in the folder. C, Java, C++, PHP, C# whatever you want. I’ll just create an HTML file as a demo. In the name of index.html. I’m just writing <h1>Hello World!</h1> we can upload any of our projects if we want.
In the git-push-demo folder, we need to initialize the git. I’ll go to the command line for him. Then I’ll change the directory to git-push-demo. You have to write to him:
| 1 | cd git-push-demo |
then I’ll write to initialize the git:
| 1 | git init |
then a local git repository will be created in our git-push-demo folder. now the task is to add our project files to this repository. I will write to him:
| 1 | git add . |
git add. this means adding all the files to the git repository. there is only one file in our project. so only one will be added.
I’ll commit after I’ve done it. I will write to him:
| 1 | git commit -m "first commit" |
Now we are ready to push this project to GitHub. Where we will push in GitHub, it’s called a remote repository. To push from the local repository to the remote, we need to add the URL of the remote repository first. I’ll get a URL for each GitHub project. Such as our git-push-demo https://github.com/yourgithubusername/git-push-demo.git. Your username. To add a remote repository, you need to write:
| 1 | git remote add origin https://github.com/ |
then I’ll push. you have to write to him:
| 1 | git push -u origin master |
this time we’ll want the username of GitHub. you’ll then want a password. pressing enter with the password will upload our project to Github. if all goes well, the success message will be shown.
and we’ll go to GitHub and see our project in the repository.
there was only one file in our project, index.html showing so.
it is very important to know the use of gite to work on a big project on your own or with a team. only the basic use of the git is shown above. how to make a git repo, how to commit to git, how to push a project on Github. etc.
I think we’re forgetting the races in our local, i.e. the project on the desktop. What shall I do now? Since we have the project on GitHub, we can easily download it from Git Hub. It can be downloaded in zip form. We can clone with git if we want. Then a copy of our project will be made again in the locality:
| 1 | git clone https://github.com/yourgithubusername/git-push-demo.git |
one more thing! the pool. pull is used to download projects from the server to your folder or to update your local project.
| 1 | git pull https://github.com |
we’ve done some work, it’s unnecessary. I don’t want to commit those things. I can write to throw away the work:
| 1 | git stash |
we can use the command above to remove something after we forget to write it down.
Git Branching & Merging:
The works on the top of the git are simple. When a developer works on a project, the above commands are usually used more. But if you work in a team, you need to know some more commands. Because when we work in a team, many developers work together on the same project. It can be seen that one person works on one feature. And that’s where the concept of the branch came from. One person works in one branch. Again, when the work of one feature becomes complete, then everything has to be added to the original project again. This is called merge.
to create a new branch, you have to write:
| 1 | git branch branch_name |
I’ll give you a simple idea. for example, if we create a website. then one of them works on the home page. the other one works on the page. then the one who works in the home will create a branch called home. and the one who does this work, will create a branch called about.
in git, the default branch is made up of one, that is, the master. after creating a branch, you have to switch from the master branch to that branch. after creating a branch, to switch to that branch, it is written:
| 1 | git checkout branch_name |
by branching, one can work on the same file again. for example, our home page is very complex. someone works with a menu. someone works with a sidebar. now two developers have to work on the same file. for this, they will make two branches. such as the menu and sidebar. if two people are in two branches, no one will see anyone’s code. after the work of the two is done, we merge the two branches, and the menu and the sidebar will become one.
once the developers’ home and about two pages have been created, or the menu and sidebar are done, we will merge the branches. merge it this way:
| 1 | git merge branch_name |
for example, we will merge the home branch first with the master branch. for that, first, I have to go to the master branch, and write git checkout master. then write git merge home. then I’ll merge with the branch master branch again. I’m going to write about git merge.
then all our work will be merged with the master. in this way, we can create as many branches as we want in a project. to view branch lists:
| 1 | git branch |
the star sign will be shown next to the branch we are in. to know what status or branch I am in, I will write:
| 1 | git status |
a branch is done. after merging with the original project, we can delete that branch if we want. in order to delete, you have to write:
| 1 | git branch -d branch_name |
for example, we will write about branch dilate:
| 1 | git branch -d about |
if we upload our project to GitHub or any other remote site, and if we want to delete our branch from that remote site as well, we should write:
| 123 | git push origin --delete branch_nameorgit push origin : branch_name |
GitHub is the public git project host. if we work on a secret project, where do we host the projects? yes, he has a private git project host for him. a private repository can also be created in GitHub. you have to count on it every month. there is a lot of free private repository, one of the best of which is bitbucket.
a private repository can be created here. you can add your own team. and so on and so on…
other resources to learn git
many complex projects can be managed with git. you have to learn, don’t you? you can start with the following link:
if you google it, you can find many more tutorials. if you learn slowly, a good skill will be created. after that, you will not want to create a project without git.
knowing these, you can work on almost any small project. for more details on git branching and merging, you can learn from the following two articles or google searches from the site of your choice:
Apart from this, if someone seems to have a terminal or command line complex, then you can use SourceTree. Git’s useful commands can be easily learned from Try Git.
the readme file in GitHub
when I go to a lot of repositors in GitHub, I see that the details about the project are beautifully written. add image video? it’s in the readme file. when creating a repository, we can tell you to create a readme file. or I can do it myself later.
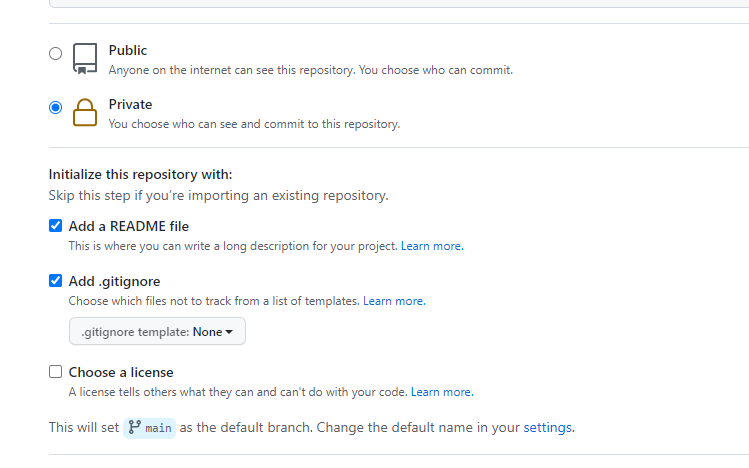
this readme file can be edited from the main page of the registry in Github. and here you have to write in markdown. there is no problem even if you don’t have an idea about the markdown. nothing complicated, you can learn the basic markdown from here. if we want, we can write and paste it into this readme file using any markdown editor.